Add a Manifest
You can extend the list of available Palette Dev Engine services with custom manifests that contain deployment specifications for Kubernetes objects such as pods, services, deployments, namespaces, or secrets.
Use the following steps to create an app profile that contains a custom manifest.
A tutorial is available to help you learn how to use Palette Dev Engine by deploying an application. Check out Deploy an Application using Palette Dev Engine to get started with Palette Dev Engine.
Prerequisites
- A Spectro Cloud account.
Add a Manifest to an App Profile
-
Log in to Palette.
-
From the User Menu, select Switch to App Mode.
-
Select App Profiles in the left Main Menu, and click on the New App Profile button.
-
Provide the following basic information for your app profile and click Next.
Parameter Description App Profile Name A custom name for the app profile. Version An optional version number for the new app profile. You only need to specify a version if you create multiple versions of a profile using the same profile name. Default: 1.0.0.Description Use the description to provide context about the profile. Tag Assign any desired profile tags. Tags propagate to the Virtual Machines (VMs) deployed in the cloud or data center environment when apps are created from this app profile. Example: ownerorregion.To learn how to create multiple profile versions that use the same name, check out Version an App Profile.
-
Select Manifest to start configuring your app profile.
warningWhen adding a manifest-type layer to an app profile, make sure you specify a namespace. Otherwise, the manifest deployment will be deployed to the
Defaultnamespace.namespace: yourNamespaceNameHere -
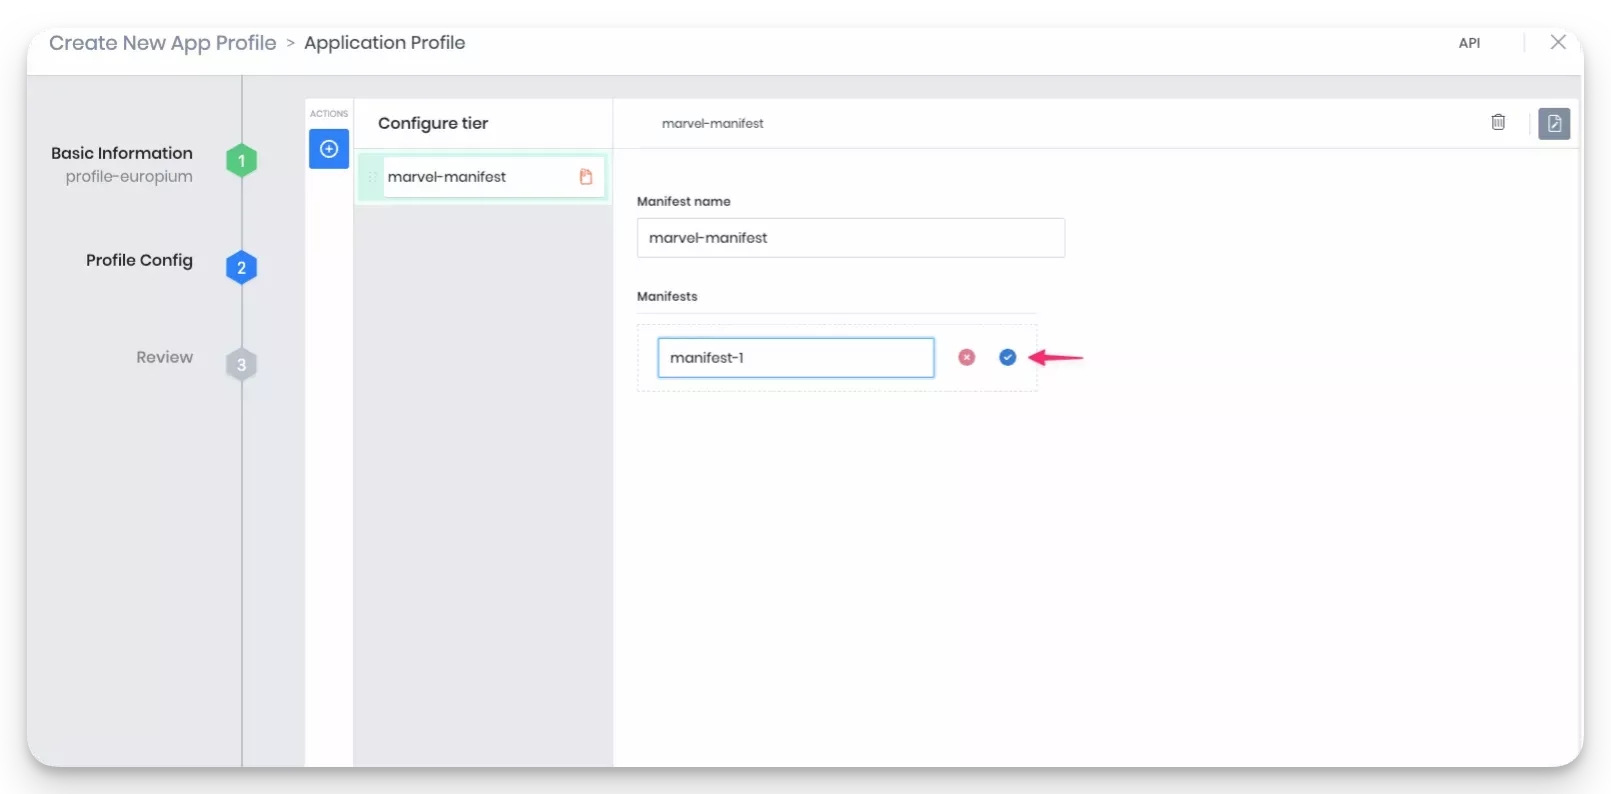
Provide a custom name for your manifest.
-
Click on Add Manifests and provide a name. Click on the blue button to add your manifest. You can add more manifests as needed. For an example of how to create a custom add-on pack using a manifest, review Add an Add-on Pack guide.

-
You can add more services to the app profile as needed. To do this, click
+next to the Configure tier pane. To rearrange layers in the profile, select a service and drag it up or down in the pane. Each service becomes a layer in the profile stack in the order displayed in this pane. -
When you have provided the required configuration information, click Review.
Your app profile is now created using a manifest and is ready to deploy.
Validate
Use the following steps to validate that your app profile is available and ready for use.
-
Log in to Palette.
-
From the User Menu, switch to App Mode.
-
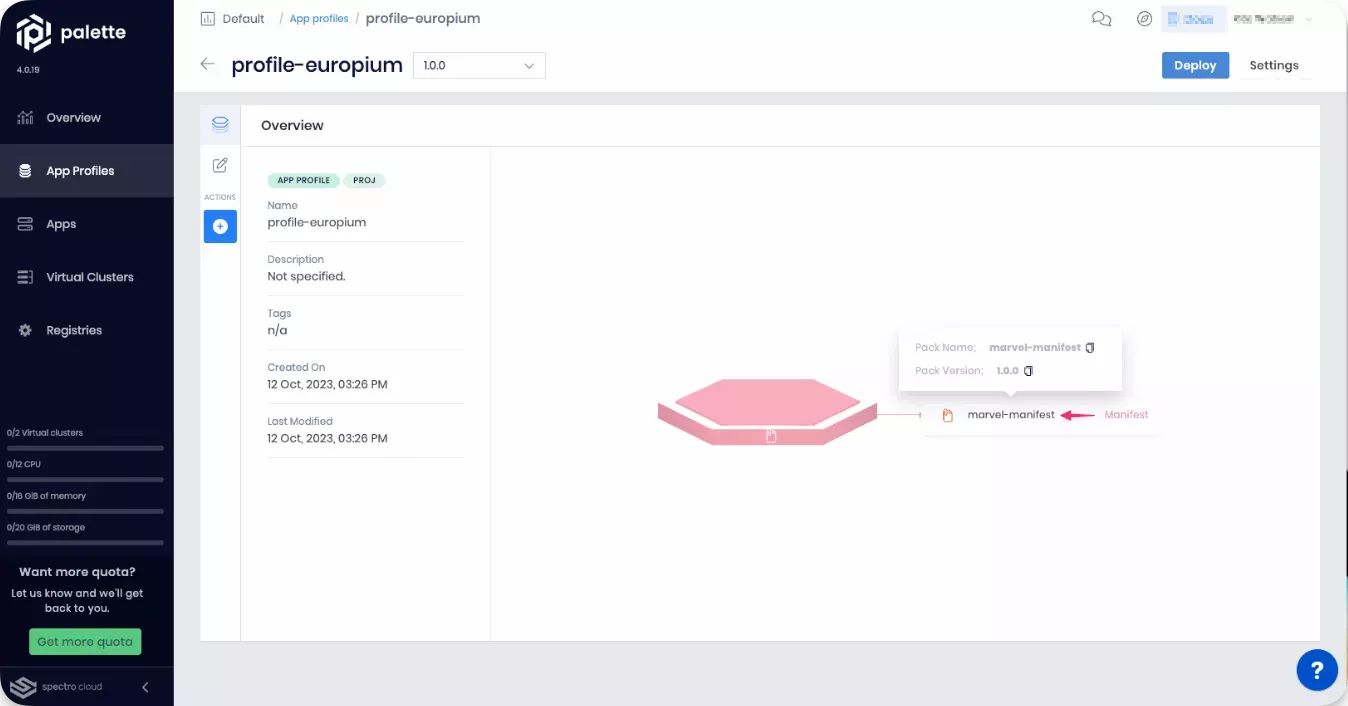
Click on App Profiles in the left Main Menu, and select the app profile you created to review its details.
-
Hover your cursor over each profile layer to learn more about them, including the service name, version, and registry.
 info
infoUse the tool-tip that displays when you select a layer to gather information required for creating Terraform templates for app profiles. Check out our Terraform registry for Application Profiles.
-
Deploy your application to a virtual cluster to verify all the required configurations and dependencies are correct. Review Create and Manage Apps to learn how to deploy an app to a virtual cluster. Check out the Deploy an Application using Palette Dev Engine tutorial for a more in-depth guide.
Next Steps
Start exploring the various services Palette exposes to application authors. Use these services to deploy applications without the overhead of managing and configuring the infrastructure required for common third-party services such as databases, message queues, and more.